
Garlic Rosemary Artisan Bread Recipe – Easy Homemade Crusty Bread
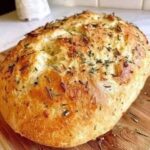
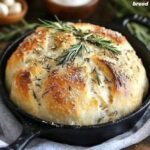
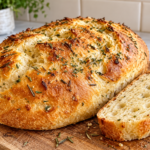
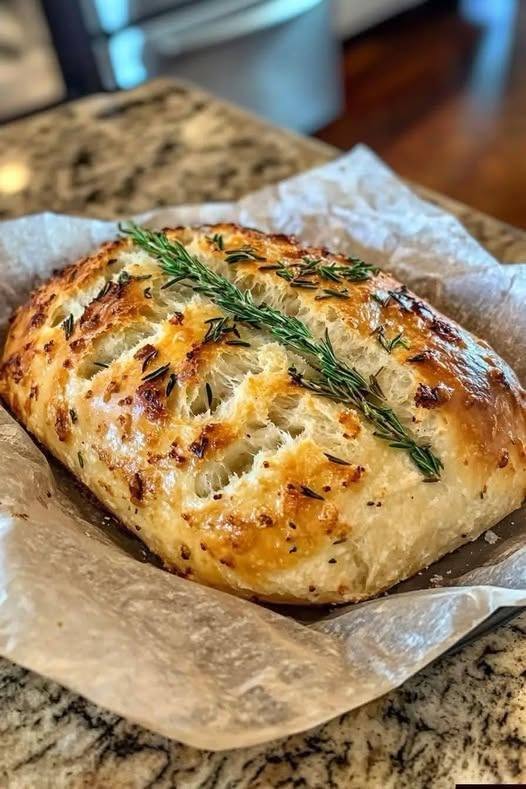
Homemade Garlic Rosemary Artisan Bread with a golden, crispy crust, soft fluffy center, fragrant rosemary, roasted garlic flavor, and a delicious olive oil finish.
Description
Garlic Rosemary Artisan Bread is a delicious homemade bread that combines the comforting aroma of freshly baked dough with the rich flavors of garlic, fresh rosemary, and olive oil. This rustic loaf features a beautifully golden-brown crust, a soft and airy interior, and an irresistible savory flavor that makes it perfect for almost any meal.
Inspired by traditional European artisan bread, this recipe delivers bakery-style results using simple pantry ingredients. The outside develops a wonderfully crisp texture while the inside stays tender, slightly chewy, and full of delicious flavor.
The combination of fresh rosemary and garlic creates an aromatic bread that pairs beautifully with soups, pasta, roasted vegetables, grilled meats, and creamy dips. It is also wonderful served warm with butter or dipped into high-quality extra virgin olive oil.
One of the best things about this homemade garlic rosemary bread is that you don’t need expensive equipment or advanced baking skills. The dough requires minimal kneading, making it suitable for beginners and experienced home bakers alike.
Whether you are preparing a special family dinner, hosting friends, or simply craving fresh homemade bread, this Garlic Rosemary Artisan Bread is a fantastic addition to your kitchen.
Recipe Information
Recipe Name: Garlic Rosemary Artisan Bread
Prep Time: 20 minutes
Rising Time: 2–3 hours
Cook Time: 35–40 minutes
Total Time: Approximately 3–4 hours
Servings: 10 slices
Yield: 1 medium-large loaf
Cuisine: Mediterranean-Inspired / European
Course: Bread, Side Dish, Appetizer
Difficulty: Easy
Ingredients
3½ cups (440 g) bread flour or all-purpose flour
1⅓ cups (315 ml) warm water, approximately 100–110°F (38–43°C)
2 teaspoons instant yeast
1¾ teaspoons fine sea salt
1 teaspoon granulated sugar or honey
3 large garlic cloves, finely minced
2 tablespoons fresh rosemary, finely chopped
2 tablespoons extra virgin olive oil
½ teaspoon freshly ground black pepper, optional
1 teaspoon dried Italian herbs, optional
1 tablespoon additional olive oil for brushing
1 small fresh rosemary sprig for garnish
A little extra flour for dusting
Instructions
Step 1: Prepare the Ingredients
Begin by gathering all the ingredients and measuring them carefully.
Using the correct flour-to-water ratio is especially important when preparing homemade artisan bread because it helps create the ideal dough consistency.
Finely mince the garlic cloves and chop the fresh rosemary leaves. Set aside a small rosemary sprig for decorating the finished loaf.
For a milder garlic flavor, gently cook the minced garlic in a little of the measured olive oil over low heat for about 30–60 seconds, just until fragrant. Allow it to cool before adding it to the dough.
Avoid browning the garlic too deeply because burnt garlic can give the bread a bitter taste.
Step 2: Activate the Yeast
Pour the warm water into a large mixing bowl.
Add the sugar or honey and stir until dissolved.
Sprinkle the instant yeast over the water and stir gently.
Allow it to sit for approximately 5 minutes. This step is optional with instant yeast, but it helps confirm that the yeast is active.
The mixture may begin developing small bubbles or a slightly foamy surface.
Make sure the water is warm rather than hot. Extremely hot water can damage the yeast and prevent the bread from rising properly.
Step 3: Mix the Bread Dough
Add the bread flour and sea salt to the yeast mixture.
Pour in the olive oil, minced garlic, chopped rosemary, black pepper, and optional Italian herbs.
Using a wooden spoon or sturdy spatula, mix everything together until a rough, shaggy dough forms.
Continue mixing until there are no large patches of dry flour.
The dough should feel slightly sticky and soft, but it should still hold together.
Avoid adding excessive flour because a dough that is too dry can produce heavy, dense bread.
Step 4: Develop the Dough
Cover the bowl and let the dough rest for 15 minutes.
With lightly damp hands, gently lift one side of the dough and fold it toward the center.
Rotate the bowl and repeat this folding process on all four sides.
This simple stretch-and-fold technique helps develop gluten without requiring extensive kneading.
Repeat the folding process once more after another 15-minute rest.
The dough should gradually become smoother, more elastic, and easier to handle.
Step 5: Let the Dough Rise
Lightly grease a large bowl with olive oil.
Transfer the dough into the bowl and cover it with plastic wrap or a clean kitchen towel.
Place it in a warm, draft-free area for approximately 1½–2 hours, or until it has roughly doubled in size.
The rising time can vary depending on the temperature of your kitchen.
A warmer room generally encourages faster rising, while a cooler kitchen may require additional time.
The dough is ready when it looks noticeably larger, airy, and slightly bubbly.
Step 6: Shape the Artisan Loaf
Once the dough has risen, gently transfer it onto a lightly floured work surface.
Avoid aggressively pressing out all the air because those small air pockets help create the bread’s fluffy interior.
Carefully fold the edges toward the center, then turn the dough over so the smooth side faces upward.
Shape it into a round or slightly oval loaf by gently pulling the dough toward yourself to create surface tension.
The finished loaf should have a rustic appearance.
Place the shaped dough onto a large sheet of parchment paper.
Step 7: Second Rise
Cover the shaped loaf loosely with a clean kitchen towel.
Allow it to rise for another 30–45 minutes.
During this time, the bread should become slightly puffier and more relaxed.
Avoid allowing the dough to overproof because excessive rising can cause it to collapse when baked.
Meanwhile, preheat your oven to 450°F (230°C).
If using a Dutch oven, place it inside while the oven preheats, following the manufacturer’s temperature recommendations.
Step 8: Prepare the Bread for Baking
Brush the surface of the loaf very lightly with olive oil.
Sprinkle a small amount of fresh chopped rosemary over the top.
Using a sharp knife or bread lame, make two or three shallow diagonal slashes across the upper surface.
These cuts allow the dough to expand naturally during baking.
For a more traditional artisan appearance, lightly dust the loaf with flour before scoring instead of brushing the entire surface with oil.
Step 9: Bake the Bread
Carefully transfer the parchment-lined loaf into the preheated Dutch oven.
Cover with the lid and bake for approximately 25 minutes.
Remove the lid and continue baking for another 10–15 minutes, or until the bread develops a deep golden-brown crust.
If using a regular baking sheet, place the loaf on a parchment-lined tray and bake for approximately 30–40 minutes. A separate oven-safe pan containing hot water on a lower rack can help create steam during the initial baking period.
The loaf is ready when the crust is golden and the center reaches approximately 200–210°F (93–99°C).
Step 10: Cool and Serve
Carefully remove the baked bread from the oven.
Transfer it onto a wire cooling rack.
Allow the loaf to cool for at least 30–45 minutes before slicing.
Cooling allows the interior crumb to finish setting, preventing a gummy texture.
For the appearance shown in the photo, decorate the cooled loaf with a fresh rosemary sprig.
Slice the bread using a serrated bread knife and enjoy it with butter, olive oil, soup, or your favorite main dish.
Recipe Notes
Fresh Rosemary: Fresh rosemary provides a stronger and more fragrant herbal flavor than dried rosemary. If fresh rosemary is unavailable, substitute approximately 2 teaspoons of dried rosemary for the 2 tablespoons of fresh rosemary.
Garlic Flavor: Fresh garlic creates a delicious savory aroma. For a sweeter, mellow flavor, use roasted garlic instead of raw minced garlic.
Flour Selection: Bread flour provides stronger gluten development and a slightly chewier texture. All-purpose flour also works well but may produce a softer loaf.
Dough Consistency: Artisan dough should be slightly sticky. Resist the temptation to add large amounts of flour during mixing or shaping.
Oven Temperature: A properly preheated oven encourages good oven spring and helps the bread develop a crisp crust.
Cooling: Allowing the bread to cool before slicing is important for maintaining a light, well-structured interior.
Expert Tips for Perfect Garlic Rosemary Artisan Bread
1. Measure flour accurately. Using a kitchen scale produces more consistent bread than measuring flour by volume.
2. Use fresh ingredients. Active yeast, fresh garlic, and aromatic rosemary improve both flavor and texture.
3. Allow sufficient rising time. Proper fermentation helps the dough develop flavor and creates an airy crumb.
4. Avoid overworking the dough. Gentle folding is enough to develop structure while preserving the dough’s air bubbles.
5. Bake with steam. Steam keeps the surface flexible during the initial baking stage and helps create a crisp artisan crust.
6. Do not rush the cooling process. Cutting hot bread too early can compress the interior and make it appear underbaked.
7. Enhance the flavor. Add a little grated Parmesan, roasted garlic, or cracked black pepper for additional savory richness.
Serving Ideas
Garlic Rosemary Artisan Bread is extremely versatile and pairs beautifully with many dishes.
With Soups: Serve thick slices alongside creamy tomato soup, vegetable soup, lentil soup, or homemade chicken soup.
With Pasta: Enjoy warm bread with spaghetti, creamy Alfredo pasta, baked lasagna, or garlic butter shrimp pasta.
With Salads: Pair it with a Mediterranean salad, Greek salad, or fresh tomato and cucumber salad.
With Olive Oil: Dip freshly sliced bread into extra virgin olive oil mixed with balsamic vinegar, black pepper, and dried herbs.
As Toast: Toast leftover slices and top them with mashed avocado, scrambled eggs, or fresh tomatoes.
With Dinner: Serve alongside roasted chicken, grilled steak, baked salmon, or roasted vegetables.
Storage and Reheating Instructions
Room Temperature: Store completely cooled bread in a bread box or loosely wrapped in a clean kitchen towel for up to 2 days. For longer room-temperature storage, use a suitable sealed bread bag, although the crust may soften.
Refrigeration: Refrigeration is generally not recommended because bread tends to become stale faster at refrigerator temperatures.
Freezing: Slice the completely cooled loaf and place the slices in a freezer-safe bag. Freeze for up to 3 months for best quality.
Reheating: Warm bread in a preheated oven at 350°F (175°C) for approximately 5–10 minutes. Frozen individual slices can be reheated directly in a toaster.
For extra flavor, lightly brush the warmed bread with olive oil or garlic butter before serving.
Nutritional Information
Estimated nutrition per slice, based on 10 slices per loaf, without additional toppings.
| Nutrient | Approximate Amount |
|---|---|
| Calories | 190 kcal |
| Carbohydrates | 34 g |
| Protein | 5 g |
| Total Fat | 4 g |
| Saturated Fat | 0.6 g |
| Dietary Fiber | 1.5 g |
| Sugar | 1 g |
| Sodium | 360 mg |
| Cholesterol | 0 mg |
Nutritional values are estimates and may vary based on the specific flour, olive oil, ingredients, and slice sizes used.
Health and Nutritional Benefits
1. Provides Energy
Bread contains carbohydrates, which supply the body with energy for everyday activities. A serving of homemade artisan bread can be part of a balanced meal.
2. Contains Olive Oil
Extra virgin olive oil provides monounsaturated fats and contributes to the bread’s soft texture and flavorful crust.
3. Includes Aromatic Herbs
Rosemary contains naturally occurring plant compounds, including antioxidants. The amount used in bread is primarily valuable for flavor rather than providing a significant therapeutic effect.
4. Homemade Ingredient Control
Making bread at home allows you to choose the ingredients, control the amount of salt, and avoid unnecessary additives.
5. Can Be Adapted for More Fiber
Replacing a portion of the white flour with whole-wheat flour can increase the fiber content, although the water requirements and finished texture may change.
Frequently Asked Questions (Q&A)
Q1: Can I make Garlic Rosemary Artisan Bread without a Dutch oven?
Yes. You can bake the bread on a regular baking sheet or baking stone. Adding steam to the oven during the initial baking stage can help create a crustier exterior.
Q2: Can I use dried rosemary instead of fresh rosemary?
Absolutely. Use approximately 2 teaspoons of dried rosemary instead of 2 tablespoons of fresh rosemary. Rub the dried herb gently between your fingers to release more aroma.
Q3: Why is my homemade artisan bread dense?
Dense bread can result from inactive yeast, insufficient rising time, too much flour, or dough that hasn’t developed enough gluten. Allow the dough to rise adequately and measure ingredients accurately.
Q4: Can I add cheese to this recipe?
Yes. Add ½–¾ cup of shredded Parmesan, mozzarella, or cheddar cheese for a delicious cheesy garlic rosemary variation. Fold it into the dough during the shaping stage.
Q5: How do I make the crust extra crispy?
Bake the bread at a sufficiently high temperature, use steam during the first part of baking, and allow the loaf to cool on a wire rack so moisture does not soften the bottom crust.
Q6: Can I prepare the dough overnight?
Yes. For overnight fermentation, reduce the yeast to approximately ½ teaspoon and refrigerate the covered dough after mixing and folding. The next day, allow it to warm and rise as needed before shaping. The longer fermentation can develop a deeper flavor.
Q7: Can this bread be frozen?
Yes. Allow the loaf to cool completely, slice it, and store it in freezer-safe packaging for up to 3 months. Reheat individual slices whenever needed.
Q8: What is the best way to serve Garlic Rosemary Artisan Bread?
For the best flavor, serve it slightly warm with butter, extra virgin olive oil, garlic butter, or alongside soup and pasta. The rosemary and garlic make this bread particularly delicious with Mediterranean-inspired dishes.
Conclusion
Garlic Rosemary Artisan Bread is a comforting homemade recipe that brings bakery-style flavor directly into your kitchen. With its beautifully golden crust, fluffy interior, fragrant rosemary, and delicious garlic flavor, this bread is perfect for everyday meals and special occasions.
The recipe uses simple ingredients, easy preparation techniques, and straightforward baking methods to create a rustic loaf that looks impressive and tastes wonderful.
Whether served warm with butter, dipped into olive oil, or enjoyed alongside a hearty dinner, this homemade Garlic Rosemary Artisan Bread is sure to become a favorite.