
No-Knead Homemade Rosemary Garlic Bread
This easy no-knead homemade bread is one of those recipes that completely changes the way you think about baking bread. You don’t need a stand mixer, eggs, butter, or special equipment. There is also no kneading required. Simply mix the ingredients, let the dough rise, shape it, and bake it in a covered oven-safe pot until golden brown and beautifully crusty.
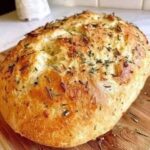
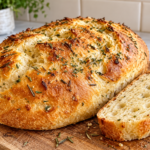
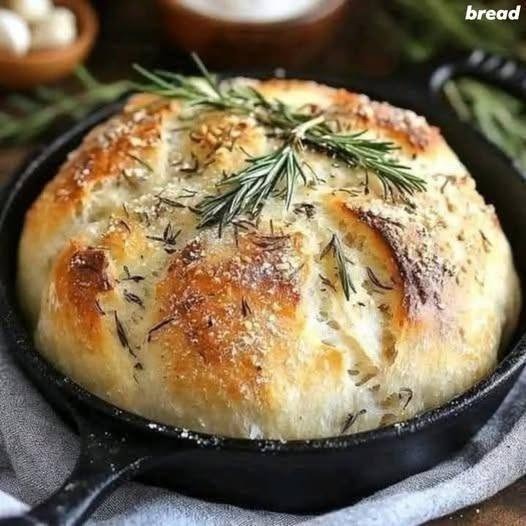
The result is a rustic loaf with a crisp, golden crust and a soft, airy, chewy centre. Fresh rosemary and garlic add a wonderful savoury aroma, while a small amount of olive oil gives the bread a delicate richness without using butter.
It is an inexpensive homemade alternative to store-bought bread and requires only a handful of basic pantry ingredients. Serve it warm with soup, pasta, roasted chicken, eggs, or salads, or simply slice it and enjoy it with olive oil.
Servings
Makes: 1 rustic loaf
Servings: 8–10 slices
Prep Time: 10 minutes
Rise Time: 2–3 hours
Cook Time: 35–45 minutes
Total Time: Approximately 3 hours 45 minutes
Difficulty: Easy
Ingredients
For the Bread
3 cups all-purpose flour
1 1/2 teaspoons salt
1 teaspoon granulated sugar
1 teaspoon instant yeast
1 1/2 cups warm water
1 tablespoon olive oil
2 cloves of garlic, finely minced
1 tablespoon fresh rosemary, finely chopped
1 teaspoon dried thyme, optional
1/2 teaspoon freshly ground black pepper
For the Topping
1 teaspoon olive oil
1 small sprig of fresh rosemary
1 teaspoon sesame seeds, optional
A small pinch of flaky sea salt, optional
Instructions
1. Combine the Dry Ingredients
Add the flour, salt, sugar, instant yeast, black pepper, and dried thyme to a large mixing bowl.
Whisk or stir everything together until evenly distributed.
The sugar is optional, but it can help support yeast activity and contribute to a nicely browned crust.
2. Add Garlic and Rosemary
Add the minced garlic and chopped fresh rosemary to the dry ingredients.
Mix gently so that the herbs and garlic are distributed throughout the flour.
Fresh rosemary gives the bread a particularly fragrant flavour. You can substitute dried rosemary if necessary, but use a smaller quantity because dried herbs have a stronger flavour.
3. Add the Water and Olive Oil
Pour the warm water and olive oil into the bowl.
Using a wooden spoon, spatula, or sturdy spoon, mix until everything comes together into a rough, sticky dough.
Do not knead the dough.
The dough should look shaggy and somewhat wet. This is exactly what you want for a no-knead bread.
If the dough looks extremely dry, add 1 tablespoon of water at a time.
If it looks excessively liquid, add a tablespoon or two of flour.
4. Let the Dough Rise
Cover the bowl tightly with plastic wrap, a lid, or a clean kitchen towel.
Leave it in a warm, draft-free place for approximately 2–3 hours.
The dough should become noticeably larger and bubbly.
Depending on your kitchen temperature, the rising time may be slightly shorter or longer.
A warmer environment generally allows the dough to rise faster, while a cooler kitchen may require additional time.
5. Prepare the Oven and Pot
About 30 minutes before baking, place a Dutch oven or heavy oven-safe pot with a lid inside the oven.
Preheat the oven to 450°F (230°C).
Allow the pot to heat thoroughly.
Using a preheated heavy pot creates the ideal environment for rustic bread because the enclosed space traps steam around the dough during the initial stage of baking.
6. Shape the Dough
Lightly flour a sheet of parchment paper or your work surface.
Carefully scrape the risen dough out of the bowl.
Avoid aggressively knocking all the air out.
Using lightly floured hands, gently shape the dough into a rough round loaf.
The dough may still feel sticky. That’s normal.
Place it on a piece of parchment paper.
Let the shaped dough rest for approximately 15–20 minutes while the oven and pot finish heating.
7. Add the Topping
Brush or drizzle the top lightly with olive oil.
Make 2–3 shallow cuts across the top of the dough using a sharp knife or bread lame.
Scatter fresh rosemary over the top.
Add sesame seeds or a tiny pinch of flaky sea salt if desired.
The cuts help the bread expand in a controlled way as it bakes.
8. Bake the Bread
Carefully remove the hot Dutch oven from the oven.
Using the parchment paper as a sling, place the dough into the hot pot.
Cover immediately with the lid.
Bake covered for approximately 25–30 minutes.
Then carefully remove the lid.
Continue baking uncovered for another 10–15 minutes, or until the bread develops a deep golden-brown crust.
For an especially crisp crust, allow it to become nicely browned rather than removing it while it is still pale.
9. Cool Before Slicing
Remove the loaf from the pot and transfer it to a wire rack.
Allow it to cool for at least 30–45 minutes before slicing.
This step is important. Cutting the bread too early can release steam and make the inside appear gummy.
Once cooled slightly, slice with a serrated bread knife and serve.
Recipe Notes
This recipe is intentionally designed to be easy and inexpensive.
The dough does not need to be kneaded because the long resting period allows the flour to hydrate and the yeast to develop the structure naturally.
The dough should be sticky. Resist the temptation to keep adding flour because excessive flour can produce a dense loaf.
A Dutch oven gives the bread its characteristic crust, but you can use another heavy oven-safe pot with a tight-fitting lid.
Make sure the pot and lid are rated for the baking temperature.
Fresh rosemary and garlic give the bread a wonderful savoury flavour, but both can be adjusted according to taste.
For a plain rustic loaf, simply leave out the garlic, rosemary, and thyme.
Helpful Tips
Use instant yeast for the easiest preparation. Active dry yeast can also work, although it may benefit from being dissolved in the warm water first.
Do not use very hot water. Extremely hot water can damage or kill the yeast. The water should feel comfortably warm, not boiling.
Measure flour accurately. Too much flour is one of the most common reasons homemade bread turns out dense.
Don’t worry about making a perfectly shaped ball. Rustic bread is supposed to have an imperfect, homemade appearance.
Preheating the Dutch oven is important. A hot pot helps create a strong oven spring and develops a beautiful crust.
Do not keep opening the oven unnecessarily during baking.
Allow the bread to cool before cutting so the interior has time to finish setting.
For an extra-crispy crust, leave the loaf uncovered during the final 10–15 minutes of baking.
How to Make It Extra Flavourful
For a stronger garlic flavour, add another clove of finely minced garlic.
You can also lightly roast the garlic before adding it to the dough for a sweeter, mellower flavour.
Add 1–2 tablespoons of grated Parmesan cheese for a savoury Italian-style loaf.
A pinch of crushed red pepper flakes creates a subtle spicy kick.
For a Mediterranean version, add chopped olives, sun-dried tomatoes, or oregano.
A little grated cheddar, mozzarella, or Gruyère can also be added to the dough for a cheesy variation.
No Dutch Oven?
You can still make this bread without a Dutch oven.
Shape the dough and place it on a parchment-lined baking sheet.
Place a separate oven-safe pan on the lower oven rack while preheating.
When you put the bread into the oven, carefully pour a little hot water into the empty pan to create steam.
Bake until the loaf is deeply golden and sounds hollow when tapped underneath.
The crust may not be exactly the same as a Dutch-oven loaf, but the bread can still turn out wonderfully.
Storage
Once completely cool, store the bread in a paper bag, bread box, or loosely covered container at room temperature.
It is best enjoyed within 2–3 days.
Avoid storing freshly baked bread in the refrigerator because refrigeration can cause bread to become stale faster.
For longer storage, slice the cooled loaf and freeze the slices in an airtight freezer bag.
Frozen slices can be warmed directly in a toaster or oven.
Estimated Nutritional Information
Approximate nutrition per serving, assuming 10 slices:
Calories: 155–175 kcal
Protein: 4–5 g
Carbohydrates: 29–32 g
Fat: 2–3 g
Fibre: 1–2 g
Sugar: 1 g
Sodium: 350–400 mg
These values are approximate and depend on the flour brand, amount of oil, serving size, and other ingredients used.
Potential Benefits
Homemade bread gives you complete control over the ingredients and allows you to avoid unnecessary additives that may be present in some packaged breads.
This recipe uses olive oil instead of butter, which provides a source of unsaturated fat.
Garlic contains naturally occurring sulphur-containing compounds, while rosemary and thyme contribute flavourful plant compounds and antioxidants.
Choosing whole-wheat flour in place of some or all of the white flour can increase the fibre content and make the loaf more filling.
The bread can also be paired with protein-rich foods, vegetables, soups, or salads to create a more balanced meal.
Frequently Asked Questions
Do I really not need to knead this bread?
Yes. The long resting period allows hydration and yeast fermentation to develop the dough structure without traditional kneading.
Can I use active dry yeast?
Yes. Active dry yeast can be substituted for instant yeast. Dissolving it in the warm water first is a good approach.
Why is my dough so sticky?
No-knead dough is naturally wetter and stickier than traditional bread dough. Don’t add excessive flour unless the dough is unusually runny.
Why didn’t my bread rise?
Several factors can affect rising, including expired yeast, water that was too hot, a cold room, or insufficient fermentation time.
Give the dough more time if your kitchen is cool.
Can I make the dough overnight?
Yes. For a slower fermentation, cover the dough and refrigerate it overnight. Allow it to sit at room temperature for a while before shaping and baking.
Can I use whole-wheat flour?
Yes, but using 100% whole-wheat flour will produce a denser loaf. For a lighter texture, replace only part of the all-purpose flour with whole-wheat flour.
Can I leave out the rosemary and garlic?
Absolutely. The basic dough works perfectly without them.
Can I add cheese?
Yes. Parmesan, cheddar, mozzarella, or Gruyère can be added for a cheesy variation.
How do I get a crispier crust?
Bake the bread covered first to trap steam, then remove the lid and continue baking until deeply golden. Allowing the loaf to cool uncovered also helps preserve its crisp crust.
Why does my bread have a gummy centre?
The most common causes are underbaking, slicing too soon, or using too much water relative to the flour.
Make sure the loaf is well browned and allow it to cool before cutting.
Can I freeze this bread?
Yes. Once completely cooled, slice it and freeze in an airtight bag for convenient use later.
Serving Ideas
This rustic bread is incredibly versatile.
Serve warm slices alongside creamy soups, tomato soup, chicken soup, or vegetable soup.
Use it as a base for bruschetta topped with tomatoes, basil, garlic, and olive oil.
Toast slices and serve with scrambled eggs for breakfast.
Pair it with grilled chicken, roasted vegetables, pasta, or salads.
For a simple snack, dip warm bread into extra-virgin olive oil seasoned with black pepper, dried herbs, and a little garlic.
You can also turn leftover slices into homemade garlic toast or crunchy croutons.
Final Note
This No-Knead Rosemary Garlic Bread proves that delicious homemade bread doesn’t have to be complicated. With flour, yeast, water, salt, a little olive oil, and a few simple flavourings, you can create a beautiful rustic loaf with a crisp golden crust and soft, airy centre.