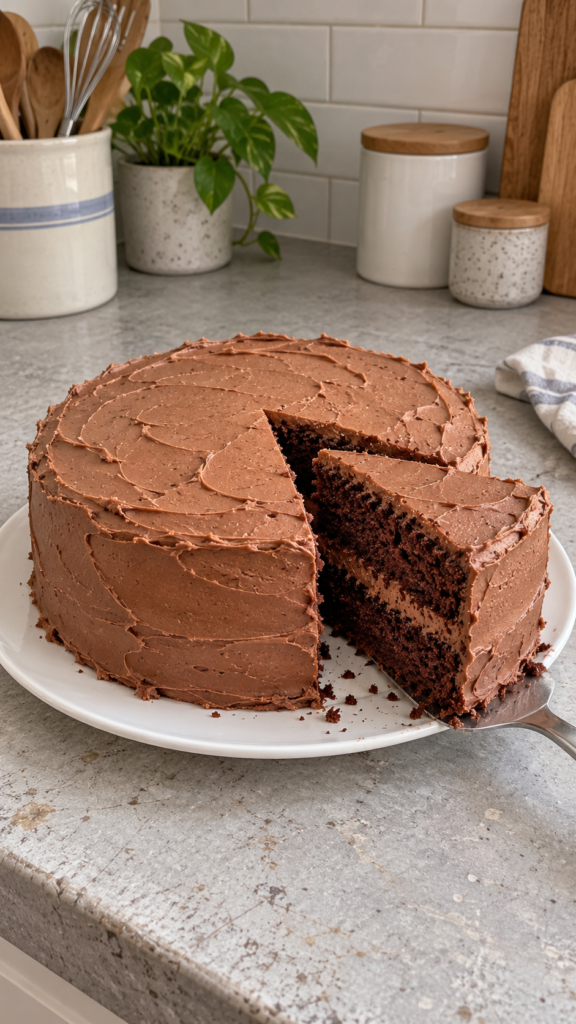

Homemade Chocolate Fudge Cake
Prep Time: 25 minutes
Cook Time: 30–35 minutes
Cooling Time: 1½–2 hours
Servings: 12
Yield: One two-layer, 8-inch cake
This homemade chocolate fudge cake features two soft chocolate sponge layers, a creamy chocolate filling, and a generous coating of chocolate frosting. The simple, hand-spread finish gives it the comforting appearance of a cake made in a home kitchen. It is a lovely choice for birthdays, family gatherings, or a weekend dessert.
An oil-based batter keeps the sponge moist, while buttermilk adds tenderness. Hot water brings out the cocoa flavor without requiring melted chocolate in the cake itself. The frosting combines butter, cocoa, and melted chocolate for a rich finish that is easy to spread.
Ingredients forHomemade Chocolate Fudge Cake
For the chocolate cake
1¾ cups all-purpose flour (210 g)
¾ cup unsweetened natural cocoa powder (65 g)
1¾ cups granulated sugar (350 g)
1½ teaspoons baking powder
1 teaspoon baking soda
¾ teaspoon salt
2 large eggs, at room temperature
1 cup buttermilk (240 ml), at room temperature
½ cup neutral vegetable oil (120 ml)
2 teaspoons vanilla extract
¾ cup hot water (180 ml)
For the chocolate fudge frosting
1 cup unsalted butter (227 g), softened
3 cups powdered sugar (360 g), sifted
½ cup unsweetened cocoa powder (45 g), sifted
4 ounces semisweet chocolate (113 g), melted and cooled
¼ cup heavy cream (60 ml), plus more if needed
2 teaspoons vanilla extract
¼ teaspoon salt
Instructions forHomemade Chocolate Fudge Cake
Step 1: Prepare the oven and pans
Preheat your oven to 350°F (175°C). Grease two 8-inch round cake pans, each at least 2 inches deep. Line the bottoms with parchment paper, then lightly grease the parchment.
Preparing the pans carefully helps the delicate layers release cleanly. Position an oven rack near the center so the cakes bake evenly.
Step 2: Combine the dry ingredients
Sift the flour and cocoa powder into a large mixing bowl. Add the granulated sugar, baking powder, baking soda, and salt. Whisk thoroughly until the mixture looks uniform.
Break up any remaining cocoa lumps. Evenly distributing the raising agents helps prevent uneven rising and pockets of bitter flavor.
Step 3: Mix the wet ingredients
In a separate bowl, whisk together the eggs, buttermilk, vegetable oil, and vanilla extract until smooth.
Room-temperature eggs and buttermilk combine more easily than cold ingredients. The oil provides moisture, while the eggs help give the cake enough structure to support the filling and frosting.
Step 4: Make the batter
Pour the wet mixture into the dry ingredients. Whisk gently until combined, scraping the bottom and sides of the bowl.
Gradually add the hot water while whisking slowly. The batter will become fairly thin; this is normal. Stop mixing once it is smooth and no dry streaks remain. Excessive mixing can make the finished cake less tender.
Step 5: Bake the layers
Divide the batter evenly between the prepared pans. Bake for 30–35 minutes, checking from about 28 minutes.
The cakes are ready when their tops spring back lightly and a toothpick inserted into the center comes out clean or with a few moist crumbs. Wet batter means they need longer. Avoid baking until the toothpick is completely dry and the edges become hard.
Step 6: Cool completely
Let the cakes cool in their pans for 10–15 minutes. Run a thin knife around the edges, turn the layers onto wire racks, and carefully remove the parchment.
Allow them to cool completely before frosting. Even slightly warm cake can soften the buttercream and cause the layers to slide. Handle the layers gently because the sponge is tender.
Step 7: Prepare the frosting
Melt the semisweet chocolate in short microwave intervals, stirring frequently, or in a heatproof bowl over gently simmering water. Set aside until cooled but still fluid.
Beat the softened butter for 2–3 minutes until creamy. Gradually add the powdered sugar and cocoa on low speed. Add the melted chocolate, cream, vanilla, and salt. Beat for another 2–3 minutes until smooth and spreadable.
Step 8: Adjust the consistency
If the frosting feels too stiff, beat in extra cream, 1 teaspoon at a time. If it is too soft, refrigerate briefly, then stir or beat again.
It should hold a soft swirl without running. Avoid adding warm melted chocolate to the butter, as this can make the frosting loose and greasy.
Step 9: Fill and frost
If necessary, trim any pronounced domes from the cooled cakes with a serrated knife. Place one layer on a serving plate and spread approximately ¾ cup of frosting over it.
Position the second layer on top. Apply a thin coating of frosting to trap loose crumbs, then refrigerate for 15–20 minutes. Spread the remaining frosting over the top and sides, creating relaxed swirls with a spatula.
Step 10: Slice and serve
Let the finished cake stand briefly if the frosting has become firm in the refrigerator. Slice with a sharp knife, wiping it between cuts for neat portions.
Serve at cool room temperature so the sponge feels soft and the frosting tastes creamy.
Tips for the Best Chocolate Cake
Weigh the flour: Too much flour can produce a dry, heavy sponge. If using cups, spoon the flour in and level it.
Use natural cocoa: This recipe is formulated with natural unsweetened cocoa rather than sweetened drinking chocolate.
Check early: Oven temperatures vary, and a few extra minutes can dry out the layers.
Cool before decorating: Patience here prevents melting frosting and unstable layers.
Keep decorations simple: Spatula swirls suit this homemade cake beautifully.
Use good chocolate: Choose a semisweet chocolate bar that you enjoy eating for the frosting.
Storage
Store the frosted cake in a covered container in the refrigerator for 4–5 days. Bring individual slices toward room temperature before serving for a softer texture.
To freeze, chill the cake until the frosting is firm. Wrap individual slices securely and place them in an airtight freezer container. Freeze for up to 2 months.
Thaw wrapped slices overnight in the refrigerator. Unfrosted cake layers can also be wrapped and frozen, making advance preparation convenient.
Serving Ideas
Serve this chocolate fudge cake with fresh strawberries, raspberries, or a small scoop of vanilla ice cream. Unsweetened whipped cream also pairs well with the rich frosting.
For a simple afternoon treat, enjoy a smaller slice with coffee or tea. For birthdays, add candles just before serving. The cake does not need extra chocolate sauce, but a light drizzle can be added to individual portions if desired.
Estimated Nutritional Information
Per serving, based on 12 slices:
Calories: Approximately 670
Protein: 6 g
Carbohydrates: 88 g
Fat: 35 g
Fiber: 4 g
Values are estimates and depend on ingredient brands, frosting quantity, and slice size.
Nutrition Notes
Cocoa contributes some fiber and minerals, while eggs and dairy provide small amounts of protein. However, this is a rich dessert containing substantial sugar and fat. Enjoy it as an occasional treat, with portion size guided by your preferences and overall meals.
Frequently Asked Questions
Can I replace the buttermilk?
Yes. Add 1 tablespoon lemon juice or white vinegar to a measuring cup, then add milk to reach 1 cup. Let stand for 5–10 minutes before using.
Can I use coffee instead of water?
Yes. Replace the hot water with the same amount of hot brewed coffee for a deeper chocolate flavor.
Can I bake the layers ahead?
Yes. Bake them a day ahead, cool completely, and wrap well. Frost the following day.
Why is my cake dry?
Too much flour or overbaking are common causes. Measure accurately and check the cakes before the full baking time has passed.
Can I make it without eggs?
An egg-free version needs adjustments to maintain structure. Simply removing the eggs from this recipe is not recommended.