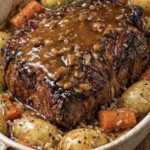
Classic Slow-Roasted Pot Roast with Herb-Crusted Baby Potatoes & Rich Pan Gravy
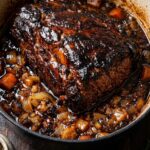
There are few dishes in culinary history as comforting, deeply satisfying, and universally beloved as a classic slow-roasted beef pot roast. Rooted in humble, rustic cooking traditions, pot roast transforms an inexpensive, tough, working muscle of beef into something extraordinarily tender, succulent, and rich. When cooked low and slow in a heavy-bottomed Dutch oven alongside aromatic vegetables, fresh garden herbs, and a deeply savory braising liquid, the connective tissue within the beef gradually breaks down into velvety gelatin. The result is meat so fork-tender that it separates into delicate, juicy strands at the mere touch of a spoon, bathed in a glossy, mahogany-hued pan gravy that clings to every bite.
Paired with golden, herb-infused baby potatoes that absorb the savory drippings while retaining a creamy interior, this meal is the quintessential centerpiece for Sunday family dinners, holiday gatherings, or chilly autumn and winter evenings. Below is an exhaustive, step-by-step culinary guide designed to help you achieve restaurant-caliber results in your own kitchen—complete with ingredient science, preparation techniques, troubleshooting tips, and serving suggestions.
Recipe Overview & Timing
Prep Time: 25 minutes
Active Cooking Time: 20 minutes
Braising / Slow-Roasting Time: 3½ to 4 hours
Resting Time: 15 minutes
Total Time: Approximately 4 hours 35 minutes
Yield: 6 to 8 generous servings
Equipment Needed: 6-to-7-quart heavy-duty enameled cast-iron Dutch oven with a tight-fitting lid, sturdy kitchen tongs, sharp chef’s knife, cutting board, paper towels, and a small whisk.
Understanding the Ingredients: Why Every Element Matters
Choosing the right cut of beef and pairing it with complementary aromatics is the secret to a truly memorable pot roast.
The Beef (3½ to 4 lbs Boneless Beef Chuck Roast): Chuck roast—cut from the shoulder area of the steer—is the undisputed gold standard for pot roast. Because the shoulder muscles do a great deal of work, chuck roast is heavily marbled with intramuscular fat and rich in collagen. While lean cuts like tenderloin or sirloin dry out and turn chalky during long cooking times, chuck roast thrives under prolonged moist heat. Look for a well-marbled roast that is roughly 2½ to 3 inches thick with an even shape so it cooks uniformly.
The Aromatics & Herbs:
Yellow Onions & Garlic: Yellow onions bring natural sweetness as they caramelize and melt into the braising liquid, naturally thickening the gravy. Smashed whole garlic cloves mellow out over four hours, infusing the broth with warm, nutty depth without any harsh bite.
Fresh Thyme & Rosemary: Woody, resinous herbs stand up remarkably well to long cooking times. Tying them into a bundle or laying whole sprigs across the roast allows their essential oils to permeate the meat and potatoes while making the stems easy to remove before serving.
The Braising Liquid & Umami Boosters:
Tomato Paste: Caramelizing tomato paste in hot fat unlocks deep umami compounds and adds subtle acidity that balances the richness of the beef fat.
Dry Red Wine: A bold, dry red wine such as Cabernet Sauvignon, Merlot, or Pinot Noir deglazes the caramelized bits (fond) from the bottom of the pan while adding brightness and complexity. (If you prefer to cook without alcohol, substitute an equal amount of beef broth mixed with 1 tablespoon of balsamic or red wine vinegar.)
Rich Beef Stock or Bone Broth: Store-bought or homemade beef bone broth provides a high-gelatin foundation that gives the finished gravy its luxurious, lip-coating body.
The Potatoes (1½ lbs Baby Yukon Gold or Creamer Potatoes): Waxy or medium-starch potatoes like Yukon Golds or baby creamers are essential here. Unlike starchy Russet potatoes—which will disintegrate into mush during a long braise—Yukon Golds hold their shape beautifully while developing a buttery, creamy interior.
Complete Ingredient List
For the Beef & Dry Rub:
3½ to 4 lbs boneless beef chuck roast, trimmed of any excessively thick exterior fat caps (leave internal marbling intact)
2 teaspoons kosher salt (or 1½ teaspoons fine sea salt)
1 teaspoon freshly cracked black pepper
1 tablespoon Italian seasoning (a blend of dried oregano, basil, thyme, and marjoram)
1 teaspoon garlic powder
½ teaspoon smoked paprika (adds subtle warmth and enhances browning)
1 large yellow onion, peeled and sliced into ½-inch thick wedges
6 cloves garlic, peeled and gently smashed with the flat side of a chef’s knife
2 tablespoons double-concentrated tomato paste
1 tablespoon Worcestershire sauce
¾ cup dry red wine (such as Cabernet Sauvignon or Merlot)
2½ cups low-sodium beef bone broth or rich beef stock
For the Vegetables & Finishing:
1½ lbs baby Yukon Gold potatoes, washed and halved (leave very small ones whole)
3 large carrots, peeled and cut on the bias into 1½-inch chunks (optional, for added sweetness)
5 to 6 sprigs fresh thyme
2 sprigs fresh rosemary
2 bay leaves
1 tablespoon cornstarch mixed with 2 tablespoons cold water (optional, for a thicker gravy)
¼ cup fresh flat-leaf parsley, finely chopped, for garnish
Flaky sea salt, for finishing
Step-by-Step Cooking Instructions
Step 1: Temper and Dry the Roast
Remove the beef chuck roast from the refrigerator 30 to 45 minutes before cooking. Allowing the meat to take off the refrigerator chill promotes more even cooking. Using clean paper towels, pat every surface of the beef completely dry. Moisture is the enemy of browning; if the surface is wet, the meat will steam in the pan rather than develop a flavorful crust.
Step 2: Season Generously
In a small bowl, mix together the kosher salt, freshly cracked black pepper, Italian seasoning, garlic powder, and smoked paprika. Rub the seasoning blend evenly over all sides of the roast, pressing gently so the spices adhere to the meat.
Step 3: Sear the Beef to Build Deep Flavor
Preheat your oven to 325°F (165°C) with a rack positioned in the lower-middle third. Place your Dutch oven over medium-high heat and add the 2 tablespoons of neutral oil. Once the oil is shimmering and just beginning to smoke lightly, carefully lay the seasoned roast into the pot.
Do not move or disturb the meat for 4 to 5 minutes. Allowing uninterrupted contact with the hot cast iron creates the Maillard reaction—a complex chemical browning that forms a dark, savory crust. Use tongs to flip the roast and sear the opposite side for another 4 to 5 minutes, then sear the thick edges for 1 to 2 minutes each until the entire roast is deeply browned. Transfer the seared beef to a clean plate and set aside.
Step 4: Sauté Aromatics and Caramelize Tomato Paste
Reduce the heat under the Dutch oven to medium. Add the 2 tablespoons of unsalted butter and the sliced yellow onion wedges. Stir occasionally for 4 to 5 minutes until the onions soften and begin to pick up the browned bits from the bottom of the pot.
Add the smashed garlic cloves and the 2 tablespoons of tomato paste. Stir constantly for 1 to 2 minutes until the garlic is fragrant and the tomato paste darkens from bright red to a deep brick color. This step cooks out any raw metallic taste from the tomato paste and deepens its sweetness.
Step 5: Deglaze the Pan
Pour in the ¾ cup of dry red wine and the 1 tablespoon of Worcestershire sauce. As the liquid bubbles vigorously, use a wooden spoon to scrape up every bit of caramelized fond stuck to the bottom of the pot. Let the wine simmer for 3 to 4 minutes until it reduces by about half, concentrating the flavor.
Step 6: Assemble the Braise
Pour in the 2½ cups of beef bone broth and bring the liquid to a gentle simmer. Nest the seared beef roast back into the center of the Dutch oven, along with any juices that accumulated on the resting plate. The liquid should come roughly halfway to two-thirds of the way up the sides of the meat—you want the roast braised, not completely submerged like soup.
Arrange the halved baby Yukon Gold potatoes (and carrot chunks, if using) snugly around the beef, partially submerged in the savory broth. Lay the fresh thyme sprigs, rosemary sprigs, and bay leaves directly on top of the beef and vegetables.
Step 7: Slow-Roast Low and Slow
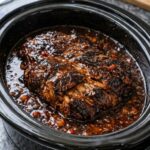
Place the lid tightly onto the Dutch oven. (If your lid isn’t completely snug, place a sheet of heavy-duty aluminum foil over the pot before pressing the lid down to trap every drop of moisture.) Transfer the pot to the preheated 325°F (165°C) oven.
Roast undisturbed for 3½ to 4 hours.Resist the temptation to lift the lid frequently, as each peek releases trapped steam and drops the internal temperature. Around the 3½-hour mark, check the roast by inserting a fork into the center and giving it a gentle twist. If the meat offers zero resistance and easily flakes apart, it is ready. If it still feels slightly firm, cover and return it to the oven for another 20 to 30 minutes.
Step 8: Rest the Meat and Finish the Pan Gravy
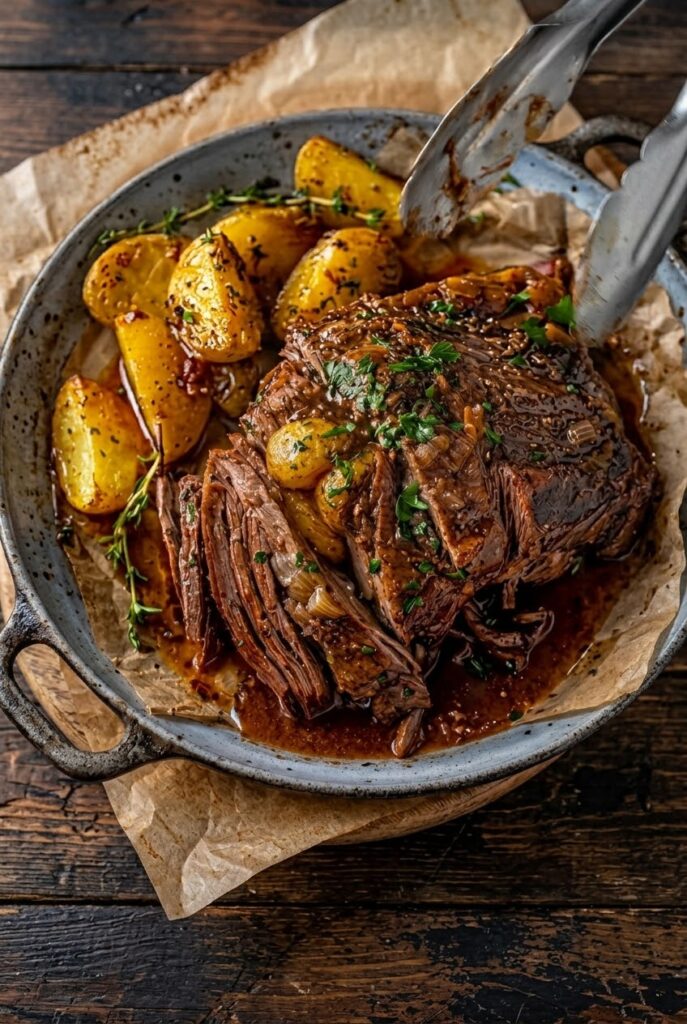
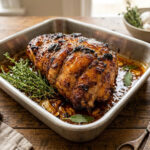
Carefully remove the Dutch oven from the oven. Using tongs or a slotted spoon, transfer the cooked potatoes and vegetables to a warm serving platter, and gently lift the roast onto a cutting board (or keep everything nestled together in a shallow serving dish as shown in rustic presentations). Discard the spent thyme, rosemary, and bay leaf stems.
Tent the meat loosely with foil and let it rest for 15 minutes so the juices redistribute throughout the muscle fibers. Meanwhile, place the Dutch oven back on the stovetop over medium heat. Skim off any excess fat floating on the surface with a wide spoon. If you prefer a thicker, velvety gravy, whisk the cornstarch slurry (1 tablespoon cornstarch + 2 tablespoons cold water) into the simmering pan juices and cook for 2 to 3 minutes until glossy and thickened. Taste and adjust seasoning with salt and pepper if needed.
Step 9: Slice, Garnish, and Serve
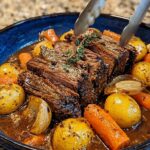
Carve the pot roast against the grain into thick, tender slices—or pull it apart into large, succulent chunks. Arrange the sliced beef alongside the golden potatoes in a wide, shallow serving bowl or skillet. Ladle the rich, glossy pan gravy generously over the top of the meat and potatoes. Finish with a scatter of freshly chopped flat-leaf parsley and a pinch of flaky sea salt.
Chef’s Tips for Perfection
Why 325°F Matters: Boiling a tough cut of meat at high heat causes muscle fibers to contract tightly, squeezing out moisture and leaving the meat dry even though it is sitting in liquid. Cooking at a gentle 325°F keeps the braising liquid at a bare simmer, melting collagen smoothly while keeping the meat fibers relaxed and juicy.
Even Better the Next Day: Like many braised dishes, pot roast tastes even better 24 hours after cooking. Cooling the meat overnight in its broth allows the fibers to reabsorb even more flavor, and the solidified fat layer on top can be lifted off effortlessly before reheating.
Serving Pairings: Serve alongside crusty sourdough bread or warm dinner rolls to soak up every last drop of the red wine pan gravy, paired with a crisp green salad tossed in a sharp Dijon vinaigrette or roasted green beans to balance the richness of the dish.