
Homemade Garlic Rolls
Prep Time: 25 minutes
Cook Time: 22–25 minutes
Rise Time: 1 hour 30 minutes–2 hours
Total Time: Approximately 2 hours 20 minutes–2 hours 50 minutes
Servings: 16 rolls
Description for Homemade Garlic Rolls
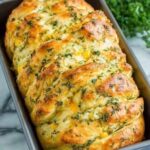
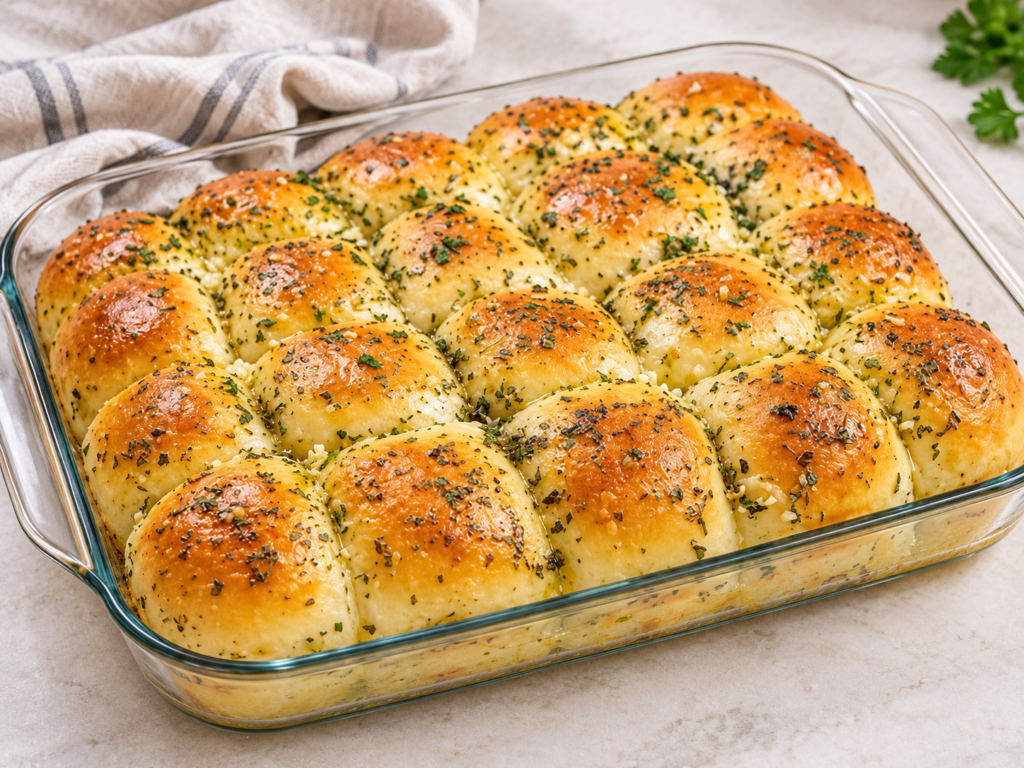
These homemade garlic rolls have golden tops, soft centers, and a buttery garlic finish. Baked close together, they rise into a batch of pull-apart rolls with tender sides and lightly browned edges. Fresh parsley adds color, while garlic butter gives every bite a savory flavor that pairs beautifully with soups, pasta, and family dinners.
This recipe is inspired by the rolls pictured in your reference image. The photograph shows risen dough, shaped rolls being brushed, and a finished golden batch. A photograph cannot reveal the exact dough formula, so the method below completes the flour, sugar, and salt measurements you supplied with a practical milk-based yeast dough.
You do not need complicated equipment to make homemade garlic rolls. A mixing bowl, baking dish, and a little patience are enough. The most important details are using warm rather than hot milk, keeping the dough soft, and allowing the rolls to become puffy before baking. Those simple steps help produce bread that feels light instead of heavy.
Ingredients for Homemade Garlic Rolls
For the dough:
- 400 g all-purpose flour, approximately 3 1/4 cups, plus a little for dusting
- 50 g granulated sugar, approximately 1/4 cup
- 5 g fine salt, approximately 1 teaspoon
- 7 g instant yeast, approximately 2 1/4 teaspoons
- 240 ml warm milk, 1 cup
- 1 large egg, at room temperature
- 50 g unsalted butter, softened, approximately 3 1/2 tablespoons
For the garlic butter:
- 60 g unsalted butter, melted, approximately 4 tablespoons
- 3 garlic cloves, finely minced or grated
- 2 tablespoons finely chopped fresh parsley
- 1/4 teaspoon fine salt, or to taste
Instructions for Homemade Garlic Rolls
Step 1: Prepare the ingredients
Measure the flour with a kitchen scale if possible. Cup measurements vary depending on how tightly flour is packed, and too much flour makes rolls dense. Warm the milk until it feels comfortably warm, around 100–110°F or 38–43°C. It should never feel hot. Let the butter soften so it mixes easily into the dough.
Step 2: Mix the dough
Combine the flour, sugar, instant yeast, and salt in a large bowl. Add the warm milk and egg, then stir until a rough dough forms. Mix in the softened butter. The dough may look uneven at first, but it becomes smoother as you knead. Instant yeast can be mixed directly into the dry ingredients; follow your yeast packet if it gives different directions.
Step 3: Knead until smooth
Knead by hand for 10–12 minutes on a lightly floured surface, or use a stand mixer with a dough hook for approximately 7–9 minutes on low to medium-low speed. The dough should become smooth, elastic, and slightly tacky. Add extra flour only a teaspoon at a time if it is too sticky to handle. A soft dough gives softer rolls.
Step 4: Let the dough rise
Place the dough in a lightly greased bowl, turning it once to coat its surface. Cover with a clean towel or reusable cover. Leave in a warm, draft-free spot for approximately 60–90 minutes, until doubled in size. A cool kitchen may require longer. Judge the dough by its expansion rather than stopping strictly when the timer ends.
Step 5: Shape the garlic rolls
Lightly grease a 9-by-13-inch baking dish. Gently press the risen dough to release large air bubbles, then divide it into 16 equal pieces. Fold the edges of each piece underneath and roll against the counter to create a smooth ball. Arrange the balls in four rows of four, leaving small spaces so they can expand and eventually touch.
Step 6: Allow the second rise
Cover the dish loosely and let the shaped rolls rise for 30–45 minutes, or until noticeably puffy. Their sides should be close to touching. Meanwhile, preheat the oven to 350°F or 175°C. Mix the melted butter with the minced garlic, chopped parsley, and salt. Stir well so the garlic does not settle entirely at the bottom.
Step 7: Brush and bake
Brush the risen rolls gently with half of the garlic butter, taking care not to deflate them. Bake on the middle oven rack for 22–25 minutes, until golden and baked through. Ovens and dishes vary, so allow a few extra minutes if necessary. If the tops brown early, loosely cover with foil. The center rolls should reach approximately 190°F or 88°C when checked with a thermometer.
Step 8: Finish and serve
Brush the hot rolls with the remaining garlic butter. Let them rest in the dish for 5–10 minutes before pulling apart. This brief rest helps the crumb settle while the butter softens the crust. Serve warm, with the buttery tops facing upward. For easy lifting, you can line the greased dish with parchment before arranging the dough balls.
Tips for Homemade Garlic Rolls
Keep the dough slightly tacky. Adding flour until it feels completely dry can create firm bread, even if the shaping becomes easier. Lightly flour your hands and work surface instead of repeatedly adding flour to the dough.
Use finely minced garlic. Large chunks may brown unevenly or taste harsh. If you prefer a gentler flavor, replace the fresh garlic with 1 teaspoon garlic powder. Dried parsley also works; use about 2 teaspoons instead of fresh parsley.
Check the yeast before starting if it has been open for a long time. Dough that barely expands may need more time in a warmer location, but inactive yeast will not improve simply by waiting. Always follow the storage advice printed on the packet.
Avoid crowding the oven with other dishes during baking. Good airflow helps the rolls cook evenly. A metal baking pan may brown the bottoms more quickly than a glass dish, so begin checking near the lower end of the baking range.
Notes for Homemade Garlic Rolls
The sugar amount you provided makes a lightly sweet dough that balances the savory garlic topping. These are soft dinner rolls rather than a crusty bread. Use the full sugar amount for this version, especially when making the recipe for the first time.
For a cheesy variation, sprinkle 2–3 tablespoons finely grated Parmesan over the brushed rolls before baking. For a stronger herb flavor, add a small pinch of dried oregano to the garlic butter. Keep additions modest so they complement the bread.
Storage for Homemade Garlic Rolls
Cool the rolls completely before storing. For this fresh-garlic butter version, refrigerate leftovers in a sealed container and use within 3–4 days. Reheat covered in a 300°F or 150°C oven for approximately 10 minutes, until warmed through. A brief microwave reheating also works, although the crust will be softer.
Freeze cooled rolls in a freezer-safe bag for up to 2 months for best quality. Separate them into portions first so you can thaw only what you need. Thaw in the refrigerator, then warm covered. Add a small amount of butter after reheating if desired.
Serving Ideas for Homemade Garlic Rolls
Serve homemade garlic rolls beside tomato soup, creamy vegetable soup, roast chicken, or baked pasta. Their soft crumb is ideal for soaking up sauces. They also work well as small sandwich rolls: split a cooled roll and fill with chicken, cheese, or roasted vegetables.
For a dinner spread, bring the whole batch to the table and let guests pull off individual rolls. A crisp salad or steamed vegetables adds freshness alongside the buttery bread. These rolls are especially appealing when served shortly after baking.
Nutritional Information for Homemade Garlic Rolls
Estimated per roll, based on 16 rolls and the full garlic butter topping: 180 calories, 4 g protein, 24 g carbohydrates, 7 g fat, 4 g saturated fat, 4 g sugar, 1 g fiber, and 200 mg sodium. Values vary with ingredient brands, roll size, and the amount of butter actually used.
Nutrition Benefits for Homemade Garlic Rolls
Flour supplies carbohydrates, while milk and egg contribute a small amount of protein. Parsley and garlic add flavor, helping create a satisfying accompaniment from familiar ingredients. These buttery rolls fit well beside meals that include vegetables and a protein source; their main role is delicious homemade bread.
Q&A for Homemade Garlic Rolls
Can I use active dry yeast?
Yes. Use 7 g active dry yeast and dissolve it in the warm milk with a little of the measured sugar. Let stand for 5–10 minutes before mixing. Rising may take longer.
Can I prepare the rolls ahead?
Yes. After shaping, cover and refrigerate overnight. The next day, let the rolls stand until puffy before brushing and baking. This may take 60–90 minutes or longer depending on room temperature.
Why are my rolls dense?
Common causes include too much flour, insufficient kneading, inactive yeast, or baking before the second rise is complete. Measure carefully and let the dough become visibly puffy.
Discover 60+ high-protein, low-carb recipes with simple instructions and everyday ingredients. Find breakfast, lunch, dinner, salad, and snack ideas—plus a 30-day meal plan to help you plan ahead.
Explore the Elite Protein Kitchen Cookbook: https://eliteproteinkitchen.gumroad.com/l/Recipes