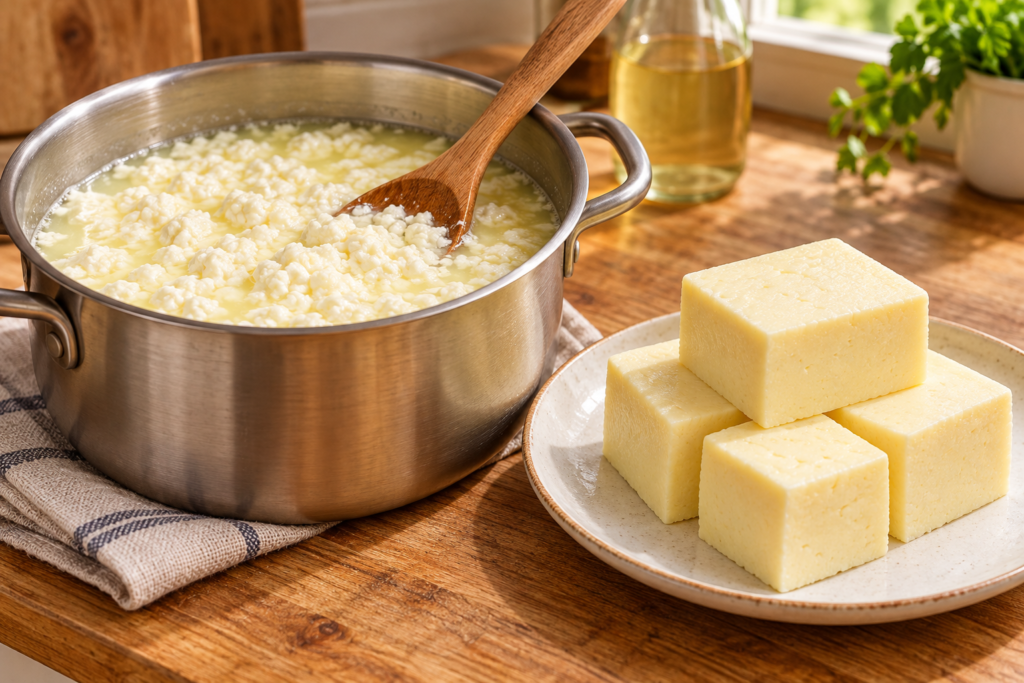

Homemade cheese with vinegar
Prep Time: 10 minutes
Cook Time: 20 minutes
Resting Time: 1 hour
Total Time: 1 hour 30 minutes
Servings: About 8
Cuisine: Homemade
Cooking Method: Stovetop, draining, and pressing
This easy homemade cheese recipe uses milk, vinegar, and salt to make mild, fresh cheese without rennet or special equipment. Heating the milk and adding vinegar separates it into curds and whey. After draining and pressing, the curds form a simple cheese that can be sliced, crumbled, or cubed. The texture depends on how long you drain and press it: a shorter press gives softer cheese, while a longer press creates a firmer block.
This is a fresh, acid-set cheese. It is useful for salads, sandwiches, wraps, and cooked dishes, but it does not melt or stretch like mozzarella or taste like aged cheddar.
Ingredients for homemade cheese with vinegar
- 1 gallon (3.8 liters) whole milk, preferably not ultra-pasteurized
- ⅓ cup white vinegar, plus up to 2 tablespoons more if needed
- 1 teaspoon salt, or to taste
- Cold water, for rinsing the curds, if desired
Whole milk gives the curds a richer texture and usually produces a better yield than low-fat milk. White vinegar provides a mild, straightforward flavor. Apple cider vinegar can also be used, though it may leave a light vinegar taste in the finished cheese.
Instructions for homemade cheese with vinegar
- Prepare the strainer. Set a colander over a large bowl so the whey can drain into it. Line the colander with clean cheesecloth or a thin, clean kitchen towel. Make sure the cloth has no strong detergent or fabric-softener scent, which could affect the cheese.
- Heat the milk slowly. Pour the milk into a large, heavy-bottomed pot. Warm it over medium heat, stirring gently from time to time so the milk does not stick to the bottom. Heat it to about 185–195°F (85–90°C). It should be steaming, with small bubbles around the edge, but should not boil vigorously.
- Add the vinegar. Turn off the heat. Slowly pour in the vinegar while stirring gently for about 10 seconds. The milk should begin separating into white curds and pale yellow-green whey. If it still looks mostly milky, add more vinegar 1 tablespoon at a time, stirring gently after each addition.
- Rest the curds. Leave the pot undisturbed for 10 minutes. During this time, the curds will gather and separate more clearly from the whey. Avoid stirring while they rest so the curds can remain large enough to drain well.
- Drain the cheese. Carefully pour the curds and whey into the lined colander. Let the whey drain into the bowl below. Drain for about 10 minutes for soft, moist cheese or 20–30 minutes for a drier, firmer cheese. Do not discard the whey until you decide whether you would like to save it for another use.
- Rinse and season. For a milder taste, briefly rinse the curds with cool water while they are still in the cloth. Let the water drain completely. Sprinkle the salt over the curds and mix it in gently with clean hands or a spoon.
- Shape the cheese. Gather the corners of the cloth and twist them gently to remove excess liquid. Shape the curds into a compact round or square. Keep the cloth wrapped around the cheese so it holds together during pressing.
- Press until firm. Place the wrapped cheese on a plate or small tray. Set a second plate on top and add a clean, moderate weight, such as a small can. Press for 30–60 minutes. Check the texture after 30 minutes; press longer if you want a firmer block. Too much weight can make the cheese dry or crumbly.
- Chill and serve. Unwrap the cheese and place it in the refrigerator until cool and firm, about 30 minutes. Slice it into blocks, crumble it over salads, or add it to sandwiches and wraps.
Discover 60+ high-protein, low-carb recipes with simple instructions and everyday ingredients. Find breakfast, lunch, dinner, salad, and snack ideas—plus a 30-day meal plan to help you plan ahead.
Tips homemade cheese with vinegar
Use milk that is not ultra-pasteurized because it may not form curds reliably. If you do not have a thermometer, watch for steam and tiny bubbles around the edge of the pot, then turn off the heat before a full boil begins.
Add vinegar gradually rather than pouring in extra all at once. Different milk brands can respond differently, and adding too much acid may give the cheese a sharper taste. Stir gently after adding the vinegar; vigorous stirring can break the curds into tiny pieces and create a grainier texture.
The cheese’s final firmness comes from draining and pressing time. For a soft cheese to crumble into dishes, drain it briefly and use little or no weight. For slices or cubes, drain longer and press it more firmly. Homemade vinegar cheese is fresh and mild, so season it to taste or add herbs after draining.
The leftover whey can be refrigerated and used in soups, bread dough, or when cooking grains. It has a mild tang and should be kept chilled until use.
Storage For homemade cheese with vinegar
Place the finished cheese in an airtight container and refrigerate it promptly. For the best flavor and texture, use it within 4 days. Keep it chilled when serving, and discard it if it develops an unusual smell, color, or texture.