
Baked Pierogi and Kielbasa Casserole
Prep Time: 15 minutes
Cook Time: 35–40 minutes
Rest Time: 5 minutes
Servings: 6
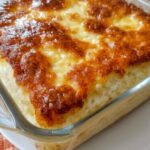
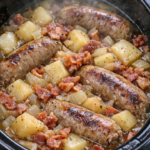
Baked Pierogi and Kielbasa Casserole brings together tender potato and cheese pierogi, browned kielbasa, sweet onions, a creamy sauce, and melted cheddar. It has the comfort of a pierogi dinner with the ease of a single baking dish. Using frozen pierogi keeps the preparation simple: there is no need to boil them before they go into the casserole.
The kielbasa and onions get a quick turn in a skillet before baking. This gives the sausage lightly browned edges and softens the onions, adding more flavor to the finished dish. Serve the casserole on its own for a hearty meal, or add a crisp salad or steamed green vegetables.
Ingredients
- 1 package (about 24 oz) frozen potato and cheese pierogi
- 14 oz fully cooked kielbasa, sliced into ¼-inch rounds
- 1 medium onion, thinly sliced
- 1 tablespoon butter
- ½ cup chicken broth
- ½ cup sour cream
- 1 teaspoon Dijon mustard
- ½ teaspoon garlic powder
- ¼ teaspoon black pepper
- 1½ cups shredded sharp cheddar cheese
- 2 tablespoons chopped green onions, for serving
Optional toppings: Extra sour cream, chopped parsley, or a little freshly ground black pepper.
Instructions
1. Prepare the baking dish
Preheat the oven to 375°F (190°C). Lightly grease a 9 × 13-inch baking dish. Keep the pierogi frozen while you prepare the other ingredients. Frozen pierogi hold their shape well as you arrange them in the dish and will cook in the sauce as the casserole bakes.
2. Brown the kielbasa and onions
Melt the butter in a large skillet over medium heat. Add the sliced onion and cook for about 5 minutes, stirring occasionally, until it begins to soften.
Add the kielbasa rounds. Cook for another 3–4 minutes, stirring now and then, until the sausage develops some browned edges. The kielbasa is already cooked, so this step is mainly for flavor and texture. Remove the skillet from the heat.
3. Make the sauce
In a bowl, whisk together the chicken broth, sour cream, Dijon mustard, garlic powder, and black pepper until mostly smooth. A few small streaks of sour cream are fine; they will blend into the casserole during baking.
The broth provides enough liquid to help the frozen pierogi cook, while the sour cream gives the sauce its creamy texture and slight tang. Dijon mustard adds a little depth without making the dish taste strongly of mustard.
4. Assemble the casserole
Arrange the frozen pierogi in the prepared baking dish in an even layer. Some overlap is fine. Spread the browned kielbasa and onions over the top, making sure each area of the dish gets some of both.
Pour the sauce evenly over the casserole. Gently shake the dish or use a spoon to help some of the liquid settle between the pierogi. Cover the dish tightly with foil. A snug cover traps steam, which helps the frozen pierogi become tender.
5. Bake and add the cheese
Bake the covered casserole for 25 minutes. Carefully remove the foil, keeping your hands clear of the steam. Check a pierogi near the center of the dish: it should be hot and becoming tender.
Sprinkle the shredded cheddar evenly over the top. Return the uncovered dish to the oven for 10–15 minutes, until the pierogi are tender throughout, the sauce is bubbling, and the cheese has melted. If your pierogi are especially large or were packed closely together, they may need a few extra minutes.
6. Rest and serve
Let the casserole rest for 5 minutes after it comes out of the oven. This gives the sauce a little time to settle, making the pierogi easier to serve. Sprinkle with chopped green onions and add a spoonful of sour cream if you like.
Tips for the Best Casserole
Use fully cooked kielbasa. Smoked, fully cooked kielbasa is the easiest choice for this recipe. Browning it briefly in the skillet brings out its flavor, and the oven heats it through with the pierogi.
Keep the dish covered for the first part of baking. The sauce needs time to warm the frozen pierogi, and the foil keeps moisture in the dish. Add the cheese after removing the foil so it melts on top instead of sticking to the cover.
Check the center before serving. Ovens and pierogi sizes vary. If a pierogi in the middle still feels firm or cool, cover the dish again and bake for another 5–10 minutes before adding or finishing the cheese.
Choose your favorite pierogi filling. Potato and cheese is a classic match for kielbasa, but potato and onion or cheddar-filled pierogi also work well. Keep the package size about the same so there is enough sauce for the dish.
Shred the cheddar yourself if convenient. Freshly shredded cheese usually melts more smoothly. Sharp cheddar gives the casserole a stronger cheese flavor, while mild cheddar makes it more mellow.
Add vegetables if you want them. A handful of cooked mushrooms or a cup of well-drained sauerkraut can be layered in with the kielbasa. If using sauerkraut, taste before adding any extra salt; both it and the sausage can be salty.
What to Serve with It
This is a filling casserole, so a fresh side makes a good pairing. Try a cucumber and dill salad, a simple green salad with a light vinaigrette, or steamed green beans. Roasted broccoli or sautéed cabbage also go well with the kielbasa and onions.
For toppings, set out sour cream, sliced green onions, and chopped parsley so everyone can finish their serving as they like. A little extra sour cream is especially nice if you enjoy the flavor of pierogi served the traditional way.
Storage and Reheating
Allow leftovers to cool, then transfer them to an airtight container. Refrigerate for up to 3 days. The pierogi will absorb some sauce as they sit, so the casserole may look thicker the next day.
To reheat a serving, place it in a microwave-safe dish, add a small splash of broth or water, and heat until hot throughout. You can also reheat a larger portion in a covered baking dish at 350°F (175°C). Add a splash of broth, cover with foil, and bake until the center is hot.
For the best texture, enjoy this casserole fresh or refrigerated rather than freezing it after baking. Sour cream sauces can change texture when frozen and reheated.
Make-Ahead Option
You can slice the kielbasa and onion, shred the cheese, and mix the sauce up to a day ahead. Keep each component covered in the refrigerator. When you are ready to cook, brown the kielbasa and onion, assemble the casserole with frozen pierogi, and bake as directed.
If you fully assemble the dish ahead of time, keep it refrigerated and bake it within 24 hours. The pierogi may begin to thaw, so check them toward the end of baking rather than relying only on the clock.
Nutrition
Estimated per serving: Approximately 550–650 calories, depending on the pierogi, kielbasa, sour cream, and cheese used. For precise nutrition information, calculate the recipe using the labels on your ingredients.
Frequently Asked Questions
Do I need to boil the pierogi first?
No. Add them to the baking dish straight from the freezer. The covered baking time and sauce help them cook until tender.
Can I use turkey kielbasa?
Yes. Fully cooked turkey kielbasa works well. Brown it with the onions just as you would regular kielbasa.
Can I use a different cheese?
Yes. Monterey Jack melts well and has a mild flavor. You can also use a mix of cheddar and mozzarella.
Why is my casserole dry?
The baking dish may not have been covered tightly, or the pierogi may have needed more liquid. Spoon a little warm broth over the dish, cover it, and return it to the oven for a few minutes.
How do I know it is ready?
The sauce should be bubbling, the cheese should be melted, and a pierogi from the center should be hot and tender all the way through.