
No-Bake Chocolate Coconut Bars
Prep Time: 20 minutes
Cook Time: 2–3 minutes to melt the chocolate
Chill Time: About 1½ hours
Servings: 12 bars
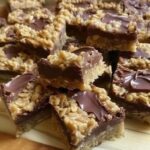
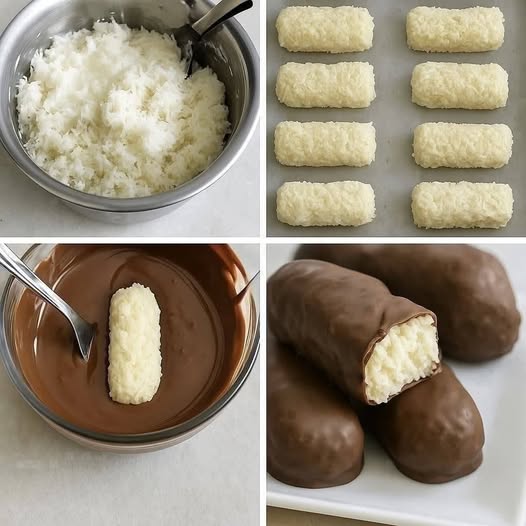
These homemade chocolate coconut bars have a soft, chewy coconut center and a smooth milk chocolate coating. The photo shows the process: shape the coconut mixture into small bars, dip them in melted chocolate, and chill them until the coating sets. They make an easy dessert for parties, lunch boxes, or an afternoon treat with coffee.
Ingredients
For the coconut filling
- 3 cups sweetened shredded coconut
- ¾ cup sweetened condensed milk
- 1 teaspoon vanilla extract
- ¼ teaspoon salt
For the chocolate coating
- 2 cups milk chocolate chips
- 2 teaspoons coconut oil
Instructions
- Prepare the tray. Line a baking sheet or large plate with parchment paper. Choose one that fits in your freezer. This will keep the shaped bars from sticking and make them easier to move when it is time to dip them.
- Make the coconut filling. Add the shredded coconut, sweetened condensed milk, vanilla extract, and salt to a large bowl. Stir until the condensed milk is evenly distributed and the coconut looks moist throughout. The mixture should hold together when squeezed in your hand. If it crumbles, stir in another teaspoon or two of condensed milk. If it feels too wet to shape, add a little more coconut.
- Shape the bars. Divide the mixture into 12 equal portions. Press each portion firmly together, then shape it into a short rectangle with rounded edges. Place the bars on the lined tray, leaving a little space between them. Pressing firmly is important: loosely shaped bars may fall apart in the melted chocolate.
- Freeze until firm. Place the tray in the freezer for about 30 minutes. The bars should feel firm when gently picked up, but they do not need to freeze solid. Chilling helps them keep their shape and makes dipping much easier.
- Melt the chocolate. Put the milk chocolate chips and coconut oil in a microwave-safe bowl. Microwave in 20-second intervals, stirring well after each interval, until nearly all the chocolate has melted. Continue stirring until smooth. Avoid overheating it, which can make the chocolate thick or grainy. Alternatively, set a heatproof bowl over a saucepan of barely simmering water and stir until melted, keeping water out of the chocolate.
- Dip the coconut bars. Remove a few bars from the freezer at a time, leaving the rest chilled. Lower one bar into the melted chocolate and turn it gently with a fork until fully coated. Lift it out on the fork and tap the fork lightly against the side of the bowl to let excess chocolate drip off. Place the coated bar back on the parchment. Repeat with the remaining bars.
- Set the coating. Refrigerate the dipped bars for about 1 hour, or until the chocolate is firm. If you want a thicker coating, let the first layer set, then dip each bar a second time and chill again.
- Serve. Enjoy the bars cold for a firmer bite, or let them sit at room temperature for 5–10 minutes for a softer coconut center.
Recipe Notes
Sweetened shredded coconut gives these bars their chewy texture and provides some of their sweetness. Sweetened condensed milk binds the coconut together, so there is no need to bake the filling. Vanilla adds a gentle dessert flavor, while a small amount of salt balances the sweetness.
The coconut oil helps the melted chocolate flow smoothly around the bars. You can leave it out if your chocolate melts thinly enough for dipping. If the chocolate begins to thicken while you work, warm it briefly and stir before dipping the next bar.
The size of the bars is up to you. Twelve bars make a generous treat similar to those in the photo. For a party platter, divide the mixture into 18–20 smaller pieces instead. Smaller pieces are also easier to dip, though you may have a little chocolate left over.
Tips for the Best Bars
Use your hands to press the filling together. A spoon will combine the ingredients, but firm pressure gives the bars their shape. Slightly damp hands can help if the mixture sticks to your fingers.
Keep the filling cold. Dip only a few bars at a time. As the coconut mixture warms, it becomes softer and more likely to break apart. Return any soft bars to the freezer for 10 minutes before continuing.
Use a deep, narrow bowl for dipping. It makes it easier to submerge a bar without needing extra chocolate. A fork works well for lifting it out and draining away excess coating.
Let the chocolate cool slightly if it is very hot. Chocolate that is warm and fluid is ideal, but very hot chocolate can soften the chilled filling as you dip it.
Clean up the edges before serving. Once the coating is set, trim any large puddles of chocolate from the bottoms of the bars with a small knife. This gives them a neat finish without affecting their homemade look.
Variations
For a less sweet bar, use semisweet or dark chocolate instead of milk chocolate. You can also drizzle a little melted white chocolate over the finished bars after the first coating has set.
To add crunch, press a whole almond into the top of each shaped coconut bar before freezing. For a tropical twist, stir a little finely grated orange zest into the coconut filling. Additions should be used sparingly so the mixture still holds together.
If you prefer bite-sized treats, roll the coconut mixture into small balls rather than rectangles. Chill and dip them in the same way. This recipe will make roughly 24 small coconut truffles, depending on their size.
Storage
Keep the bars in an airtight container in the refrigerator for up to 1 week. Place parchment between layers to prevent them from sticking together.
For longer storage, freeze them in an airtight container for up to 2 months. Thaw in the refrigerator before serving. They can also be eaten directly from the freezer if you enjoy a firmer, colder bar. Avoid leaving them in a hot room or direct sunlight, as the chocolate coating can soften and melt.
Nutritional Information
Estimated per bar, based on 12 bars: approximately 300–330 calories. The exact amount depends on the brands of coconut, condensed milk, and chocolate you use, as well as how much coating remains on each bar. These are sweet dessert bars, so smaller portions may be useful if you want a lighter serving.
Why Make These at Home?
Making coconut bars at home lets you choose the chocolate you like and shape them to your preferred size. The recipe needs only a few ingredients and very little cooking. Most of the preparation time is hands-on shaping and dipping; the refrigerator does the rest. They are also convenient to prepare ahead of a gathering because they keep well when chilled.
Questions and Answers
Can I use unsweetened coconut?
Yes, but the bars will taste less sweet and the texture may differ. Start with the same amount, mix it with the condensed milk, and adjust with a little more condensed milk if the mixture does not hold together.
Can I make these without coconut oil?
Yes. Melt the chocolate chips on their own and stir until smooth. If the chocolate is too thick for dipping, add a small amount of coconut oil.
Why did my coconut bars fall apart while dipping?
The filling may not have been pressed firmly enough, or the bars may have warmed up. Shape the mixture tightly and freeze it until firm before dipping. Work with a few bars at a time.
Can I make them ahead of time?
Absolutely. Make the bars a day or two before serving and keep them covered in the refrigerator. Take them out just before serving so the chocolate stays firm.
Do these bars need to be baked?
No. The coconut filling is ready once mixed and shaped, and the chocolate sets as it chills.