
Homemade Sweetened Condensed Milk
Prep Time: 5 minutes
Cook Time: 50–70 minutes
Yield: About 1 cup, or 16 tablespoons
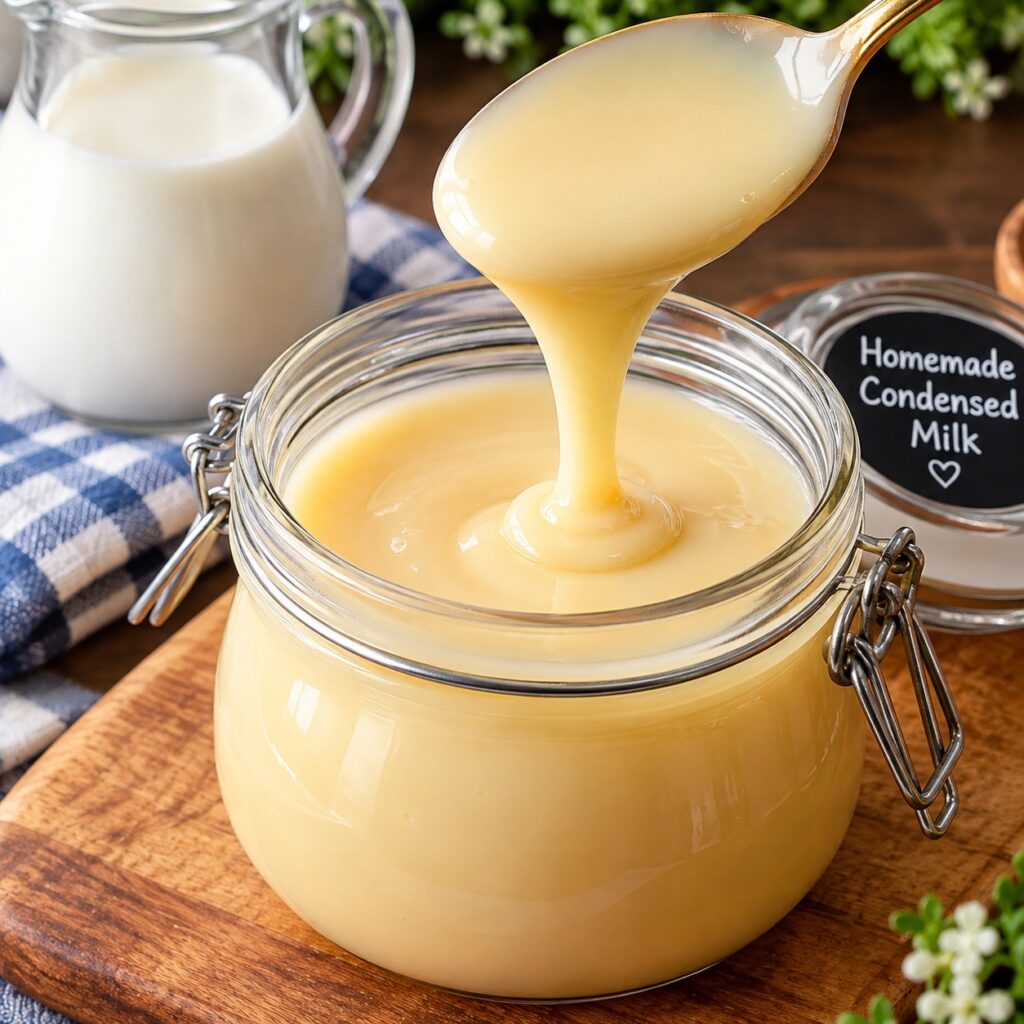
The image shows a jar of pale golden condensed milk with a thick, smooth ribbon falling from a spoon. Homemade sweetened condensed milk gets that texture by simmering milk and sugar slowly until much of the water evaporates. It takes patience, but the ingredients are simple and the result is useful for coffee, desserts, and sweet sauces.
This recipe makes approximately one cup. The exact yield may vary slightly depending on the width of your pan and how long you simmer the mixture. It will look thinner while warm and thicken as it cools, so remove it from the heat while it still pours from a spoon.
Ingredients
2 cups whole milk
⅔ cup granulated sugar
1 tablespoon unsalted butter, optional
½ teaspoon vanilla extract, optional
Whole milk gives the finished condensed milk its creamy texture. The sugar adds sweetness and helps create the glossy consistency shown in the photo. Butter makes it a little richer, while vanilla adds a gentle flavor. Both are optional if you want a simpler mixture for recipes that call for plain sweetened condensed milk.
Instructions
Choose a suitable saucepan. Use a wide, heavy-bottomed saucepan with enough space above the milk for it to bubble gently. A wide pan exposes more surface area, helping the liquid evaporate. The heavy base helps prevent scorching.
Combine the milk and sugar. Pour the whole milk into the saucepan and add the granulated sugar. Set the pan over medium heat and stir until the sugar dissolves. You should no longer feel grains of sugar against the bottom of the pan when you stir.
Bring it to a gentle simmer. Watch the milk as it warms. When small bubbles appear near the edges and the surface begins to move slightly, reduce the heat to low. Keep the mixture at a gentle simmer throughout cooking. A rapid boil can cause it to rise in the pan, stick to the bottom, or darken too much.
Reduce the mixture. Simmer uncovered for about 50–70 minutes. Stir occasionally at first, moving the spoon across the bottom and around the sides of the pan. As the milk becomes thicker, stir more frequently. This is especially helpful during the final 15–20 minutes, when it can catch on the bottom more easily.
Check the consistency. The mixture is ready when it has reduced to approximately 1 cup and lightly coats the back of a spoon. It should flow slowly in a ribbon, similar to the condensed milk in the image, but it does not need to be as thick while hot. Pour a little onto a cool plate if you want to see how it behaves after cooling for a minute.
Add optional flavorings. Remove the saucepan from the heat. Stir in the butter until melted, followed by the vanilla, if using. Whisk gently until the mixture looks smooth and even.
Cool and store. Let the condensed milk cool, stirring it a few times as it does. Transfer it to a clean jar, cover, and refrigerate. It will thicken further once chilled. Stir before using.
Tips
Keep the heat low. Slow simmering is the key to a pale, creamy result. If the milk starts bubbling vigorously, lower the heat immediately. If your stove runs hot even on its lowest setting, move the pan partly off the burner for a moment, then return it once the bubbling settles.
Stir more often near the end. At the beginning, the mixture is thin and needs only occasional attention. Once it begins coating the spoon, check it regularly. Scrape the bottom gently with a silicone spatula or wooden spoon so a thick layer does not form there.
Look for reduction as well as thickness. Homemade condensed milk may seem too thin while it is hot. If it has reduced to about one cup and coats a spoon, let it cool before deciding whether it needs more cooking. Continuing to simmer it until it is very thick in the pan can make it too stiff after refrigeration.
Adjust a thick batch gently. If your condensed milk becomes too thick after chilling, stir in a teaspoon of warm milk at a time until it reaches the consistency you need. Warm the jar’s contents gently first if they are too firm to stir easily.
For a smooth finish, whisk while cooling. A thin skin may form on the surface as the milk cools. Stirring a few times helps blend it back in. If small lumps remain, you can pour the cooled mixture through a fine strainer before storing it.
Use plain condensed milk for baking. If a dessert recipe calls for sweetened condensed milk, you may prefer to leave out the vanilla and butter so they do not change its flavor. In coffee or as a dessert drizzle, both additions can be delicious.
Storage
Store homemade sweetened condensed milk in a clean, covered jar in the refrigerator for up to 5 days. Use a clean spoon each time you take some out. It may become noticeably thicker in the refrigerator; a good stir usually makes it smooth again.
Unlike an unopened commercial can, this homemade version is not shelf-stable. Keep it refrigerated rather than leaving it on the counter. If it develops an off smell, unusual color, or visible mold, discard it.
For longer storage, freeze it in a freezer-safe container with a little room for expansion for up to 2 months. Thaw it in the refrigerator and whisk well before using. The texture may be slightly less smooth after freezing, so thawed condensed milk is especially suitable for mixing into drinks or batters.
Serving Ideas
Stir a spoonful into hot coffee or iced coffee for sweetness and a creamy finish. You can also add it to strong black tea, using a little at first and tasting before adding more.
For dessert, drizzle it over strawberries, sliced bananas, pancakes, or a bowl of fruit. Its thick texture also makes it useful in homemade ice cream, dessert fillings, and no-bake sweets. If you are following another recipe, measure your homemade batch before adding it. This recipe yields about 1 cup, while a recipe calling for a full commercial can may require a larger quantity.
You can also make a quick sweet sauce by stirring a small amount of condensed milk into warm chocolate. For a simple treat, spread a thin layer on toast and add sliced fruit. It is quite sweet, so a little goes a long way.
Nutrition Benefits
Whole milk contributes some protein and calcium. However, sweetened condensed milk also contains a substantial amount of added sugar, so it is generally used as a dessert ingredient or sweetener in small portions.
Approximate nutrition per tablespoon: 50–60 calories. The amount will change with the final yield and whether you add butter. For precise nutrition, calculate it using your milk brand and the amount your finished batch produces.
Q&A
Is sweetened condensed milk the same as evaporated milk?
No. Evaporated milk is concentrated milk without the large amount of added sugar used here. It is thinner and cannot usually replace sweetened condensed milk directly in a dessert recipe.
Can I use low-fat milk?
Yes, but the result may taste less rich and have a less creamy mouthfeel. Whole milk is the best choice if you want a texture close to the one in the image.
Why is my condensed milk runny?
It may need more time to reduce. First, let a small spoonful cool to check its true thickness. If the cooled sample is still runny, return the pan to low heat and simmer a little longer.
Why did it turn brown?
The heat may have been too high, or the mixture may have cooked past the point needed for condensation. Lower heat and more frequent stirring near the end will help keep the next batch pale golden.
Can I double the recipe?
Yes. Use 4 cups milk and 1⅓ cups sugar in a large, wide saucepan. Simmer until the mixture reduces to about 2 cups. A larger batch can take longer, so judge it by the final amount and texture rather than cooking time alone.